Table of content as following:
1REQUIREMENT – Back to top
At the basic level, this template will require the following conditions:
- Compatible with version Joomla: Joomla 3.x
- Compatible with K2 Component
- Compatible with HikaShop Component
- Installation Packages include:
- Quickstart Package
- Template package only
- Extensions package from our store
2HOW TO DOWNLOAD – Back to top
Download Packages from our store:
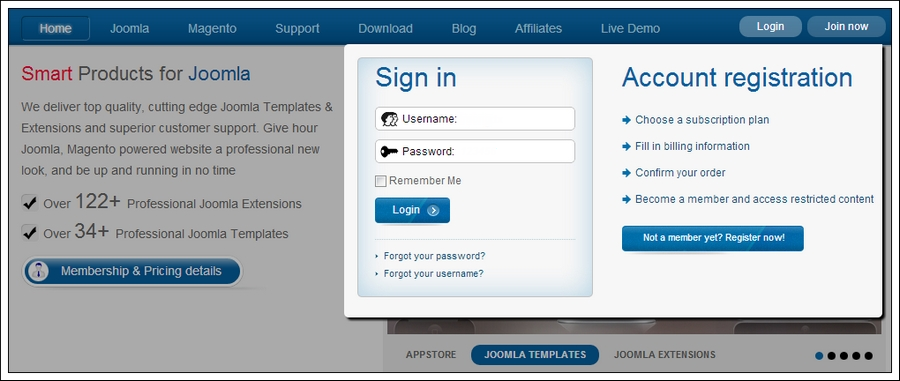
Step 1: Login your account
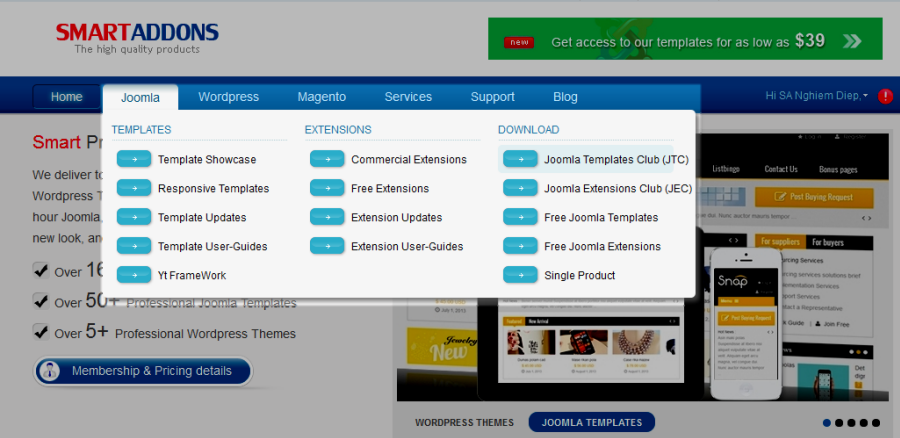
Step 2: Go to Joomla > Download > Joomla Templates Club
Step 3: Under Premium Joomla Templates –> click to download template as you want
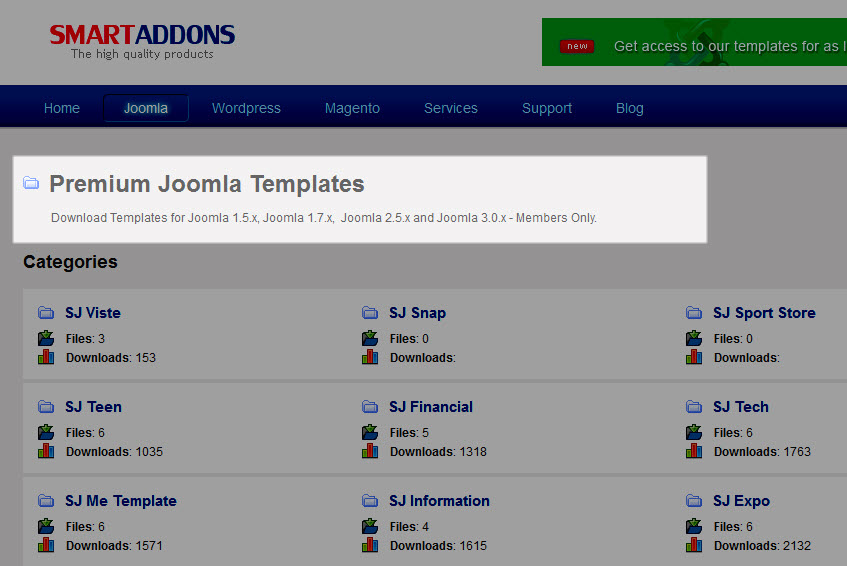
Step 4: Under name of template –> Download packages as you want
3HOW TO INSTALL – Back to top
There are two ways to install a Joomla Template:
- Install quickstart: By using this package, you will set the template exactly as our Demo with sample data. This is applied when you need a fresh Joomla with our template.
- Install Template and Extensions: This is applied when you have already installed a Joomla instance on your server. You will need only be using the zipped files in “Extensions” and “Template” folders mentioned above.
3.1 Install with Quickstart Package:
The following steps will guide to install a quickstart package of SmartAddons Joomla Template: Click here
3.2 Install with Template and Extensions:
Log in your Administrator, go to Extensions > Extension Manager

Then install Template and Extensions as below.
3.2.1 Install Template:
Step 1: Click Choose File/Browse button, select our template file you have downloaded > Upload & Install.
Step 2: Go to Extensions > Template Manager and set SJ Kampe to become the default template as below

3.2.2 Install Extensions:
Here is list of extensions that are used in the template.

Step 1: Install Extensions that are developed by SmartAddons. Please Unzip First the Extension package for getting SmartAddons extensions then install each of them as install template above.
Step 2: Enable/Public plug-ins. Note: all plug-ins listed are imperative.
- YT Framework Plug-in supports to add extra parameters used with Mega Menu and to compress CSS/JS/HTML when optimizing code. Besides, configure Yt Framework to show SJ Help with Report Bugs, Template Tutorials and YT Framework Tutorials or include j Query into template. You can go here for getting more information of this plug-in.
- SJ listing Ajax for K2 supports to insert Load more button in item-list view of K2 Component. This helps load items on the font-end just by clicking on Load more button without reloading its page. For more info about this module, please go here.
- SJ listing Ajax for Content supports to insert load more button in Category Blog or Featured Articles template of Content Component. This helps load items on the font-end just by clicking on load more button without reloading its page. For more info about this module, please go here.
You need to install and activate them when using this template. Let’s start from 1 – 2 – 3 to active plug-ins as below:
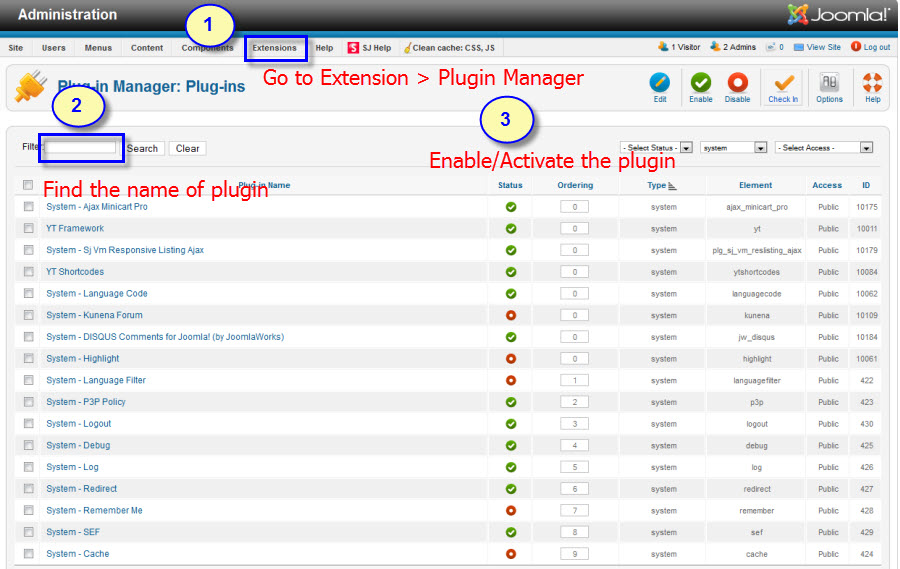
After install template/extensions, please go to next step – Configuration of template as 4. Part below
3.3 Install multilingual site in SJ Template
To help you better about language problem when you work with SJ Template. We will instruct you how to set up multilingual site in SJ Template. FOLLOW US!
3.4 Install with Hikashop Component:
Note 1: Please go HERE to download HikaShop Component.
Note 2: Please go HERE to readmore details about HikaShop Review .
4HOW TO CONFIGURE – Back to top
The following part we will guide how to configure the template becomes the same with our home page – Demo
4.1 Modules Positions

4.2 Template Configuration
Go to Extensions > Template Manager > SJ Kampe. All of parameters of this template are divided into the following groups, in which they are explained themselves:
OVERVIEW

GENERAL

LAYOUT

MENU

THEME

TYPOGRAPHY

CONTENT COMPONENT
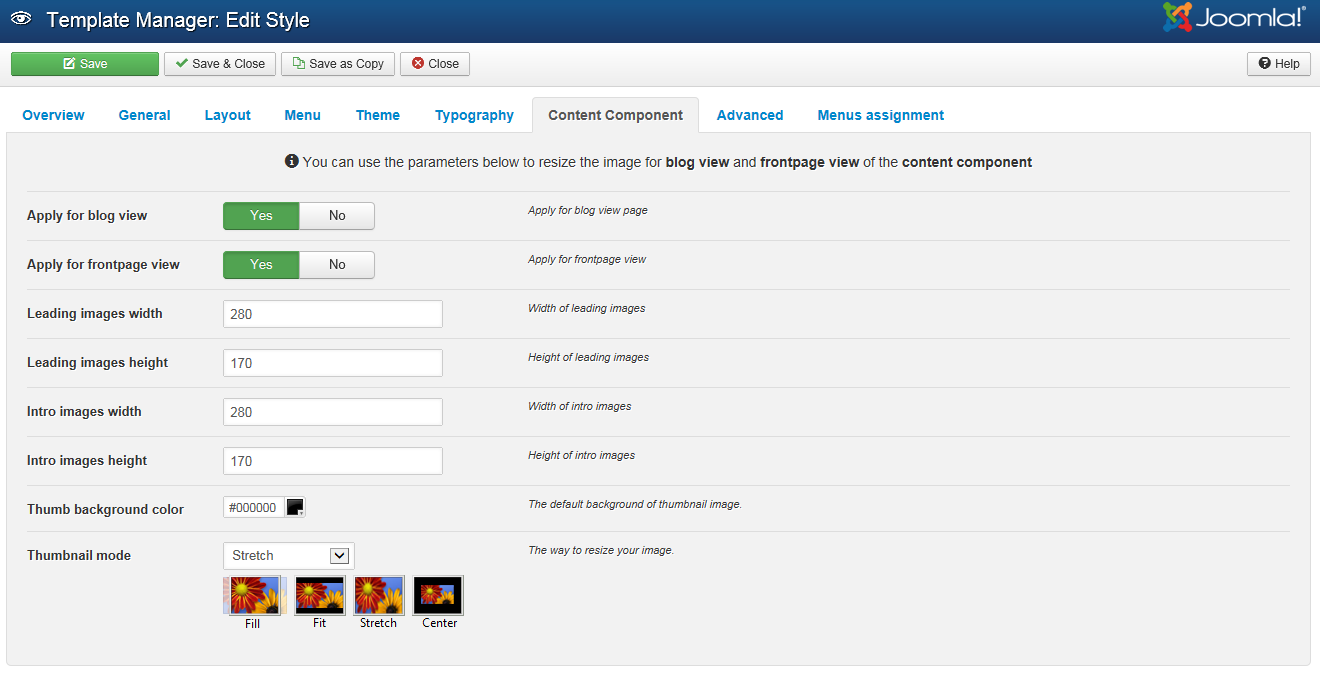
ADVANCED

4.3 Menu Configuration
4.3.1 Mega menu Configuration
To configure Mega Menu, go to: Extensions –> Template manager –> open SJ Kampe template, in the Menu setting, you can configure Mega Menu. To view more guide about how to install, set up and configure SJ Mega Menu as you want, please click here
4.3.2. Menu Item Configuration

NOTE: Please go HERE to readmore How To Configure Mega Menu for SJ Template.
HIKASHOP MENU: TREE OF MENU – MENU PARAM
Frontend
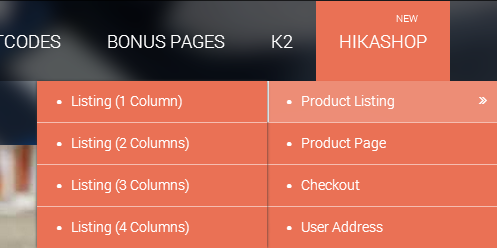
Backend: Product Listing
4.4 Extension Configuration
4.4.1. Top 1
Module Position – Module Suffix
Suffix: “top-menu”
Frontend

Backend: Top 1
Code Custom HTML of “Top 1”:
|
1 2 3 4 5 6 |
<ul class="menu"> <li><a href="#"> Support </a></li> <li><a href="#"> FAQs </a></li> <li><a href="#"> Sitemap </a></li> <li><a href="#"> Help </a></li> </ul> |
Module Position – Module Suffix
Suffix: “top-menu”
Frontend

- Backend: Language Switcher
- Backend: Share Button
- Backend: Smart Search
4.4.3. Mini Cart – Hikashop Cart Module
Module Position – Module Suffix
Suffix:
Frontend

Backend: Mini Cart
4.4.4. SJ Dynamic Slideshow – SJ Dynamic Slideshow Cart Module
Module Position – Module Suffix
Suffix: “hidden-phone “
Frontend

Backend: Slideshow
4.4.5. Categories on 1 level – Hikashop Module
Module Position – Module Suffix
Suffix:
Frontend
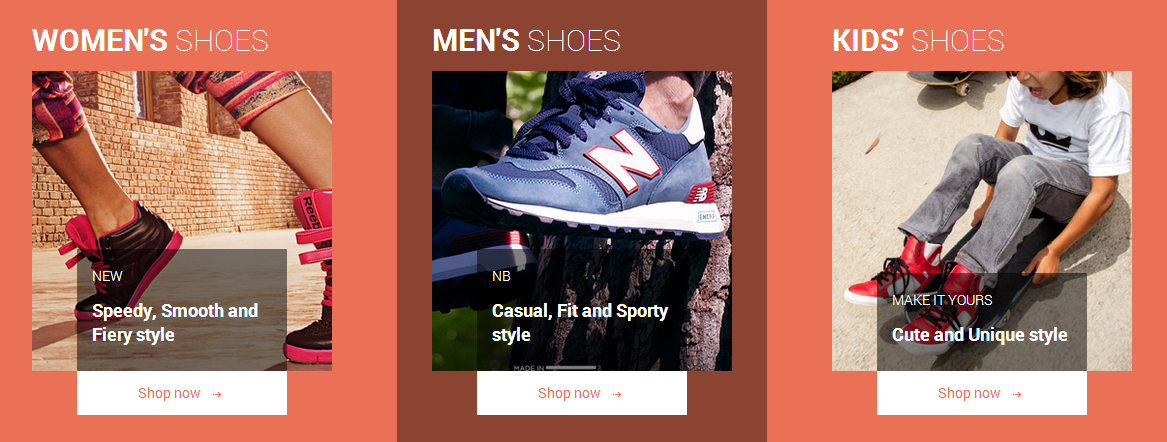
Backend: Categories on 1 level
4.4.6. Product – SJ Listing Tabs for Hikashop Module
Module Position – Module Suffix
Suffix: Product
Frontend
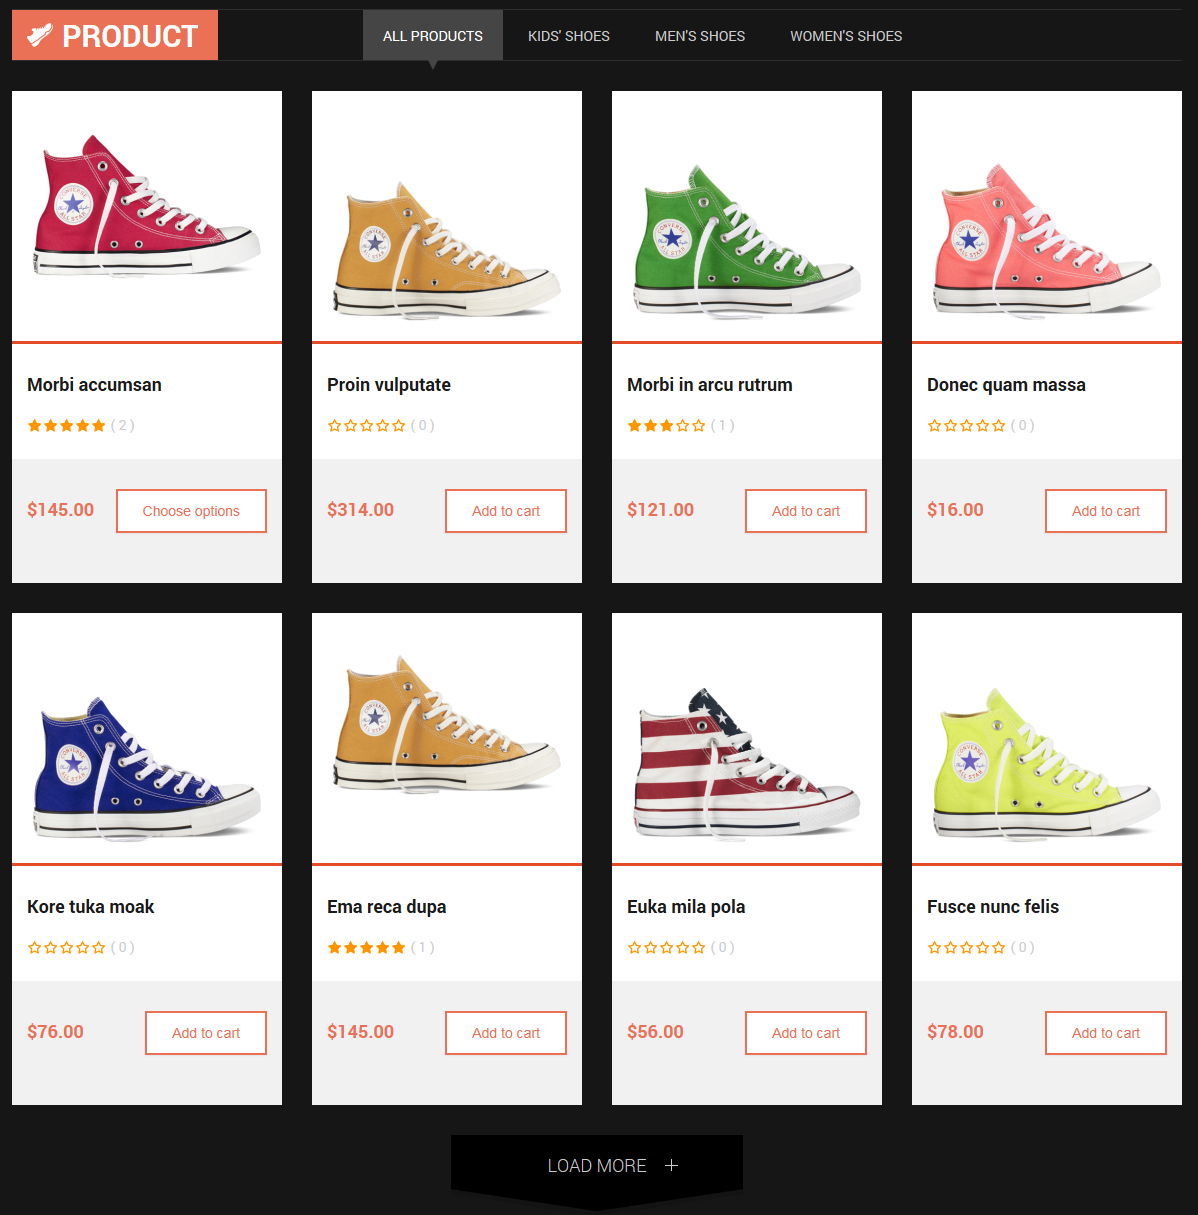
Backend: Product
4.4.7. Service – Custom HTML Module
Module Position – Module Suffix
Suffix: sj-service
Frontend

Backend: Service
Code Custom HTML of “Service”:
|
1 2 3 4 5 6 7 8 9 10 11 12 13 14 15 16 17 18 19 20 21 22 23 24 25 26 27 28 29 30 31 32 |
<div class="service-inner"> <ul> <li class="service-left item1 clearfix"> <div class="service-image"><a href="#"><img src="images/demo/s1.png" alt="" /></a></div> <div class="service-info"> <h4><a href="#">Maecenas pretium</a></h4> <p>Sed ac nulla orci. Morbi a urna risus. Morbi blandit odio eget luctus tincidunt. Integer lobortis felis eget posuere facilisis.</p> </div> </li> <li class="service-right item2 clearfix"> <div class="service-image"><a href="#"><img src="images/demo/s2.png" alt="" /></a></div> <div class="service-info"> <h4><a href="#">Maecenas scelerisque</a></h4> <p>Mauris faucibus non ligula a pellentesque. Morbi posuere neque sit amet orci condimentum gravida. Phasellus in neque ac turpis</p> </div> </li> <li class="service-left item3 clearfix"> <div class="service-image"><a href="#"><img src="images/demo/s3.png" alt="" /></a></div> <div class="service-info"> <h4><a href="#">Vestibulum risus </a></h4> <p>Interdum et malesuada fames ac ante ipsum primis in faucibus. Vivamus ut felis et quam pretium lacinia. Vestibulum ante ipsum primis</p> </div> </li> <li class="service-right item4 clearfix"> <div class="service-image"><a href="#"><img src="images/demo/s4.png" alt="" /></a></div> <div class="service-info"> <h4><a href="#">Nam ac consectetur </a></h4> <p>Donec accumsan sem at consequat interdum. Cras tempor purus sit amet rhoncus bibendum. Mauris euismod sed justo sed elementum</p> </div> </li> </ul> </div> |
Module Position – Module Suffix
Suffix: sj-blog
Frontend
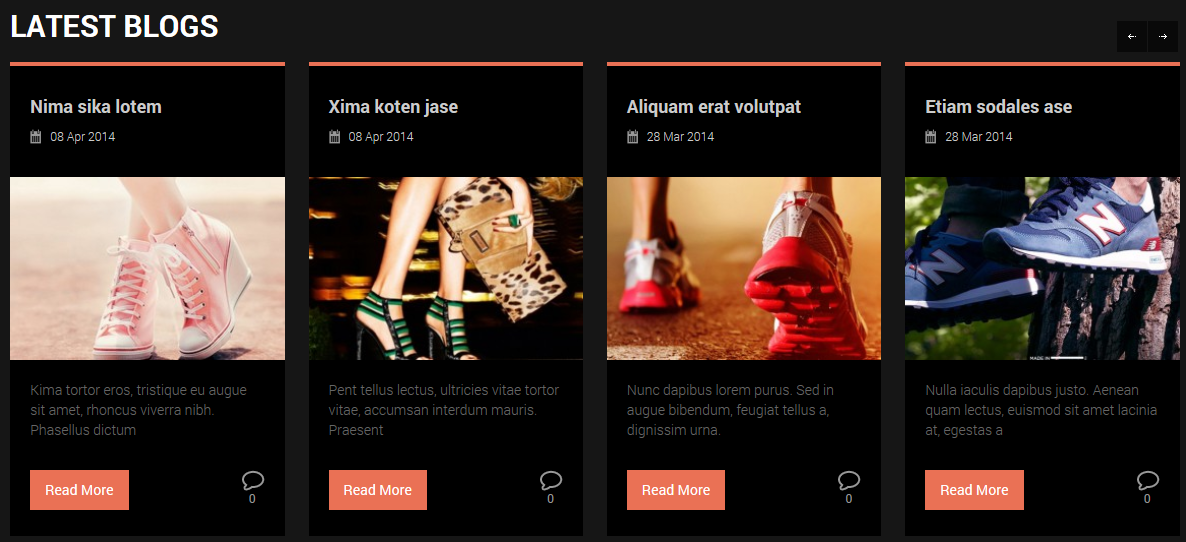
Backend: LATEST BLOGS
4.4.9. Footer 1
Frontend
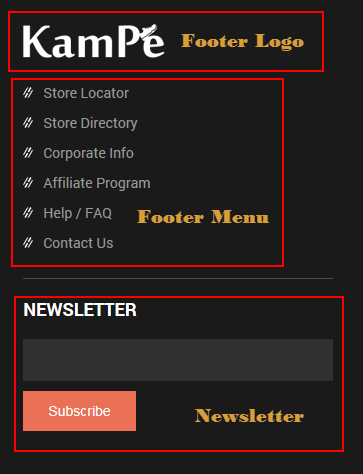
- Backend: Footer Logo
Code Custom HTML of “Footer Logo”:
|
1 |
<p><img src="images/demo/logo-footer.png" alt="" /></p> |
- Backend: Footer Menu
Code Custom HTML of “Footer Menu”:
|
1 2 3 4 5 6 7 8 |
<ul class="menu"> <li><a href="#"> Store Locator </a></li> <li><a href="#"> Store Directory </a></li> <li><a href="#"> Corporate Info </a></li> <li><a href="#"> Affiliate Program </a></li> <li><a href="#"> Help / FAQ </a></li> <li><a href="#"> Contact Us </a></li> </ul> |
- Backend: Newsletter
Code Custom HTML of “Newsletter”:
|
1 2 3 |
<div class="newsletter-inner"><form id="subscribe" action="http://feedburner.google.com/fb/a/mailverify" method="post" target="popupwindow"> <div class="subscribe-content"><input id="newsletter" name="email" type="email" value="email address" /> <input name="uri" type="hidden" value="#" /> <input name="loc" type="hidden" value="en" /> <button>Subscribe</button></div> </form></div> |
Frontend
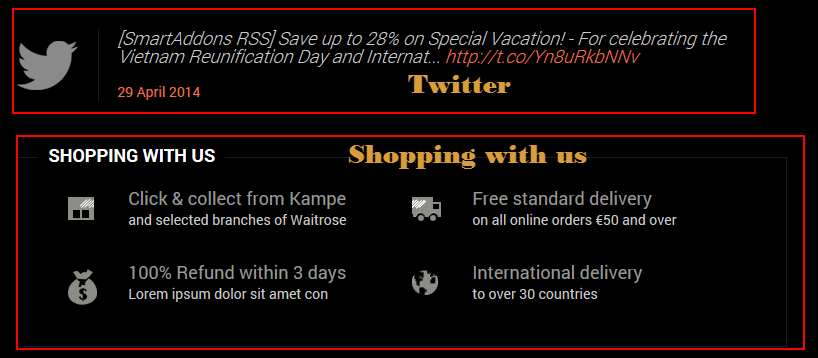
- Backend: SJ Twitter Slider
Note: Please go HERE to know How To Get Consumer Key and Consumer Secret on Twitter
Code Custom HTML of “Shopping with us”:
|
1 2 3 4 5 6 7 8 9 10 11 12 13 14 15 16 17 18 19 20 21 22 23 24 25 26 27 28 29 30 31 32 33 34 35 36 37 |
<div class="footer-shopping"> <div class="footer-shopping-inner"> <h3 class="modtitle">Shopping with us</h3> <div class="shopping-content"> <ul class="clearfix"> <li class="col-left clearfix"> <div class="shopping-img"><img src="images/demo/icon-collect.png" alt="" /></div> <div class="shopping-right"> <h3><a href="#">Click & collect from Kampe</a></h3> <p>and selected branches of Waitrose</p> </div> </li> <li class="clearfix"> <div class="shopping-img"><img src="images/demo/icon-car.png" alt="" /></div> <div class="shopping-right"> <h3><a href="#">Free standard delivery</a></h3> <p>on all online orders €50 and over</p> </div> </li> <li class="col-left clearfix"> <div class="shopping-img"><img src="images/demo/icon-money.png" alt="" /></div> <div class="shopping-right"> <h3><a href="#">100% Refund within 3 days</a></h3> <p>Lorem ipsum dolor sit amet con</p> </div> </li> <li class="clearfix"> <div class="shopping-img"><img src="images/demo/icon-world.png" alt="" /></div> <div class="shopping-right"> <h3><a href="#">International delivery</a></h3> <p>to over 30 countries</p> </div> </li> </ul> </div> </div> </div> |
Module Position – Module Suffix
Suffix:
Frontend
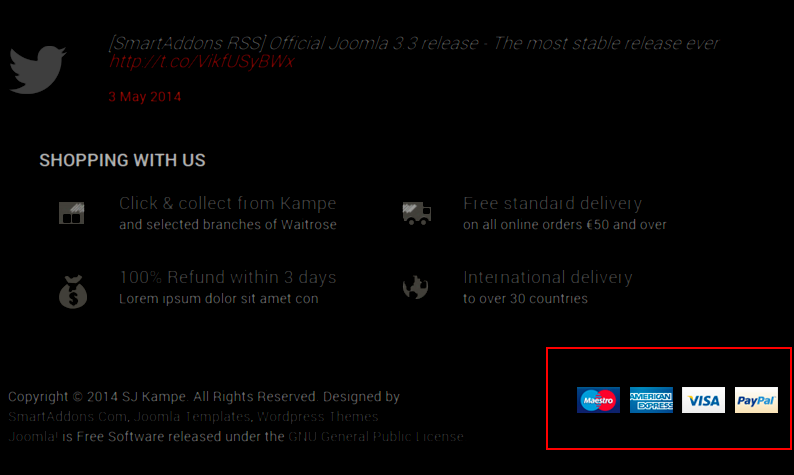
Backend: Payment
Code Custom HTML of “Payment”:
|
1 |
<div class="pull-right"><img src="images/demo/paypal.png" alt="" /></div> |
5SUPPORT – Back to top
Thank you so much for purchasing this template. If you have any questions that are beyond the scope of this help file, please send us via: Submit a Ticket
Thanks so much!

